

- Checks your calendar for upcoming meetings.
- Finds relevant emails about those meetings.
- Creates a summary document with key discussion points.
You’ll interact with your agent through chat, just like texting a helpful assistant.
Before you start
You’ll need:- A LangSmith account (sign up here).
- A Gmail account.
- A Google Calendar.
- An OpenAI or Anthropic API key (Step 1 will show you how to get one).
Step 1. Get your API key
Your agent needs an API key to connect to an AI model. The AI model is what allows your agent to understand and respond to your requests.- OpenAI (ChatGPT)
- Anthropic (Claude)
- Go to platform.openai.com/api-keys.
- Click Create new secret key.
- Give it a name like “Agent Builder”.
- Copy the key (it starts with
sk-). - Save it somewhere safe, you’ll need it in Step 2.
Cost: Both services charge based on use.
Step 2. Add your API key to LangSmith
Now you’ll add your API key to LangSmith so your agents can use it:1
Open Settings
- Go to smith.langchain.com.
- Click the Settings icon in the bottom left.
2
Go to Secrets
Click the Secrets tab at the top.
3
Add your key
- Click Add secret.
- For Key, enter:
OPENAI_API_KEY(if using OpenAI)ANTHROPIC_API_KEY(if using Anthropic)
- For Value, paste the API key you copied in Step 1.
- Click Save secret.
Your agent now has access to an AI model to understand and respond to your requests. Next, you’ll create your agent.
Step 3. Create your agent
1
Navigate to Agent Builder
- In the LangSmith UI, click the no-code toggle in the lower left-hand navigation.
2
Choose a template
- Select Templates in the left-hand navigation.
- Select Email Assistant template.
- Click Use this template.
3
Authorize accounts
Your agent will ask you to connect your Google accounts:
- Click Connect.
- Sign in with your Google account.
- Review permissions and click Allow.
- You’ll be redirected back to LangSmith where your agent will be created.
Your agent only accesses your accounts when working on tasks you give it. You can revoke access anytime in your Google account settings.
Step 4. Customize your agent
1
Customize for meeting prep
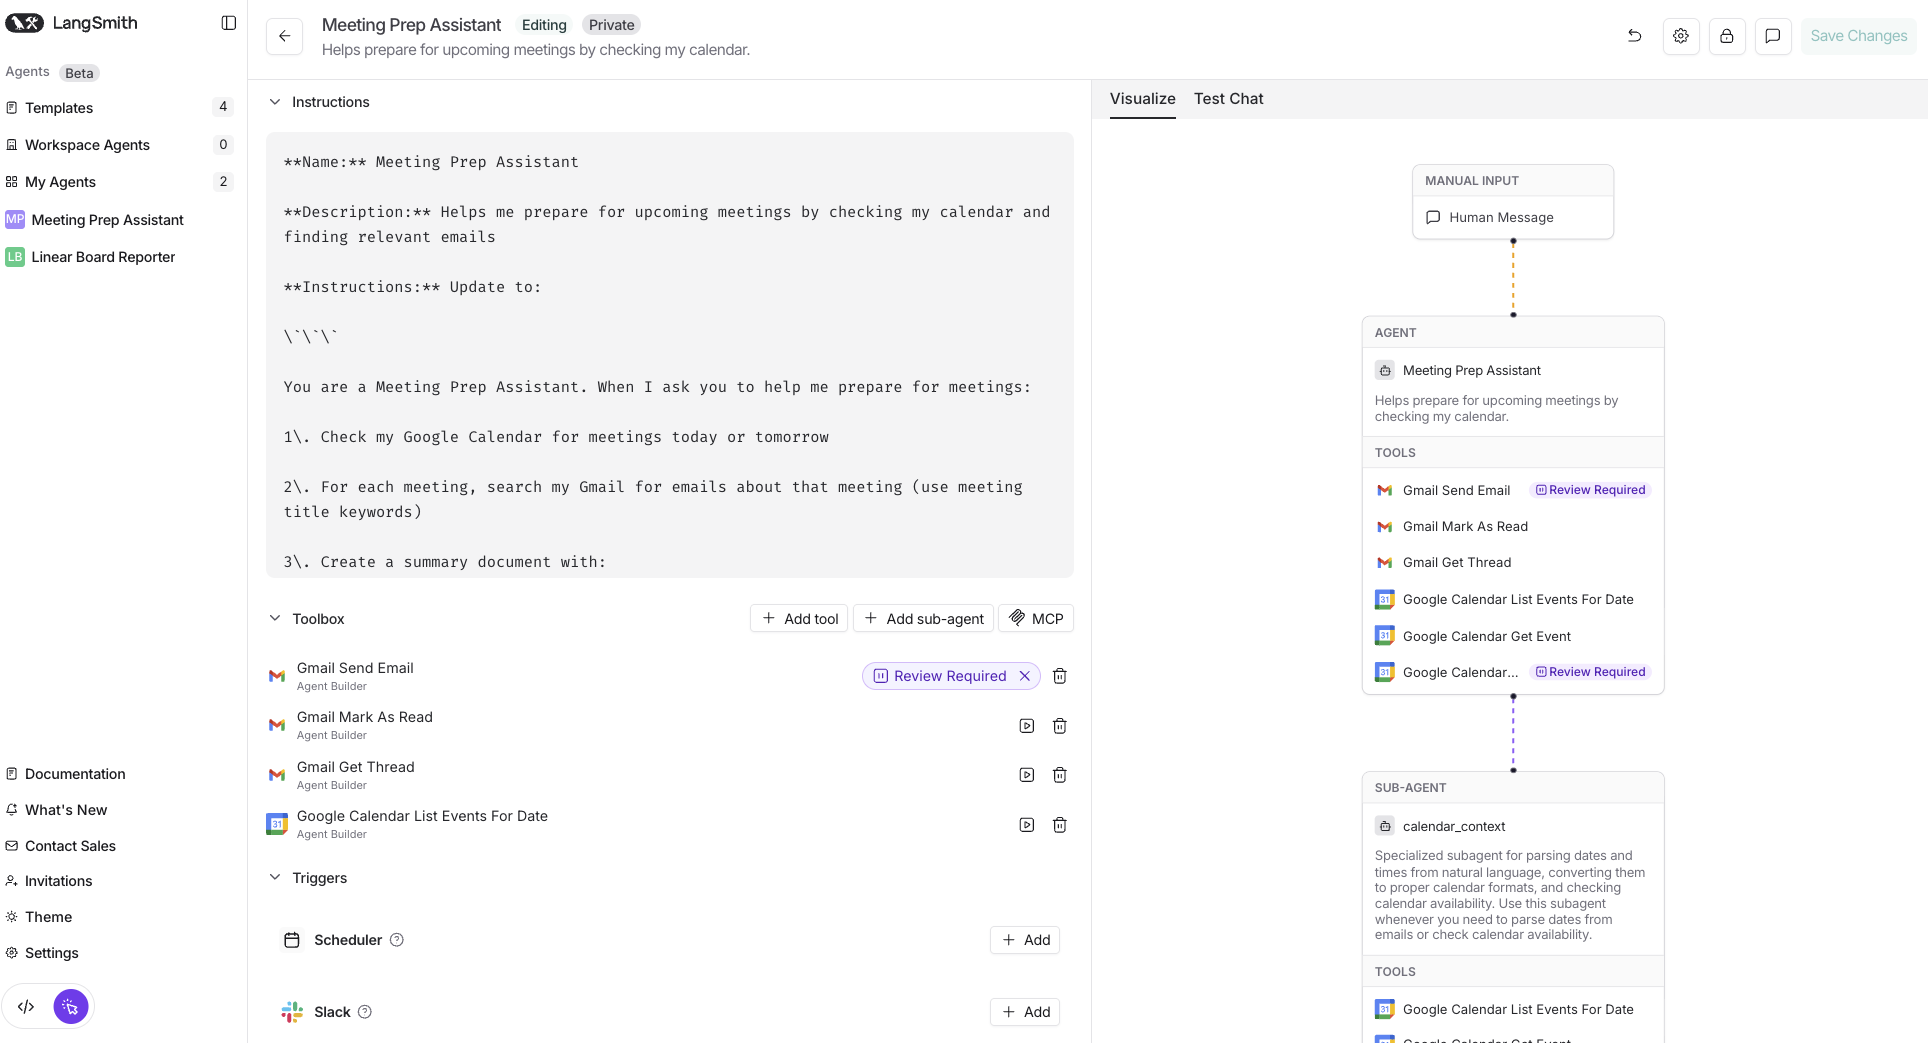
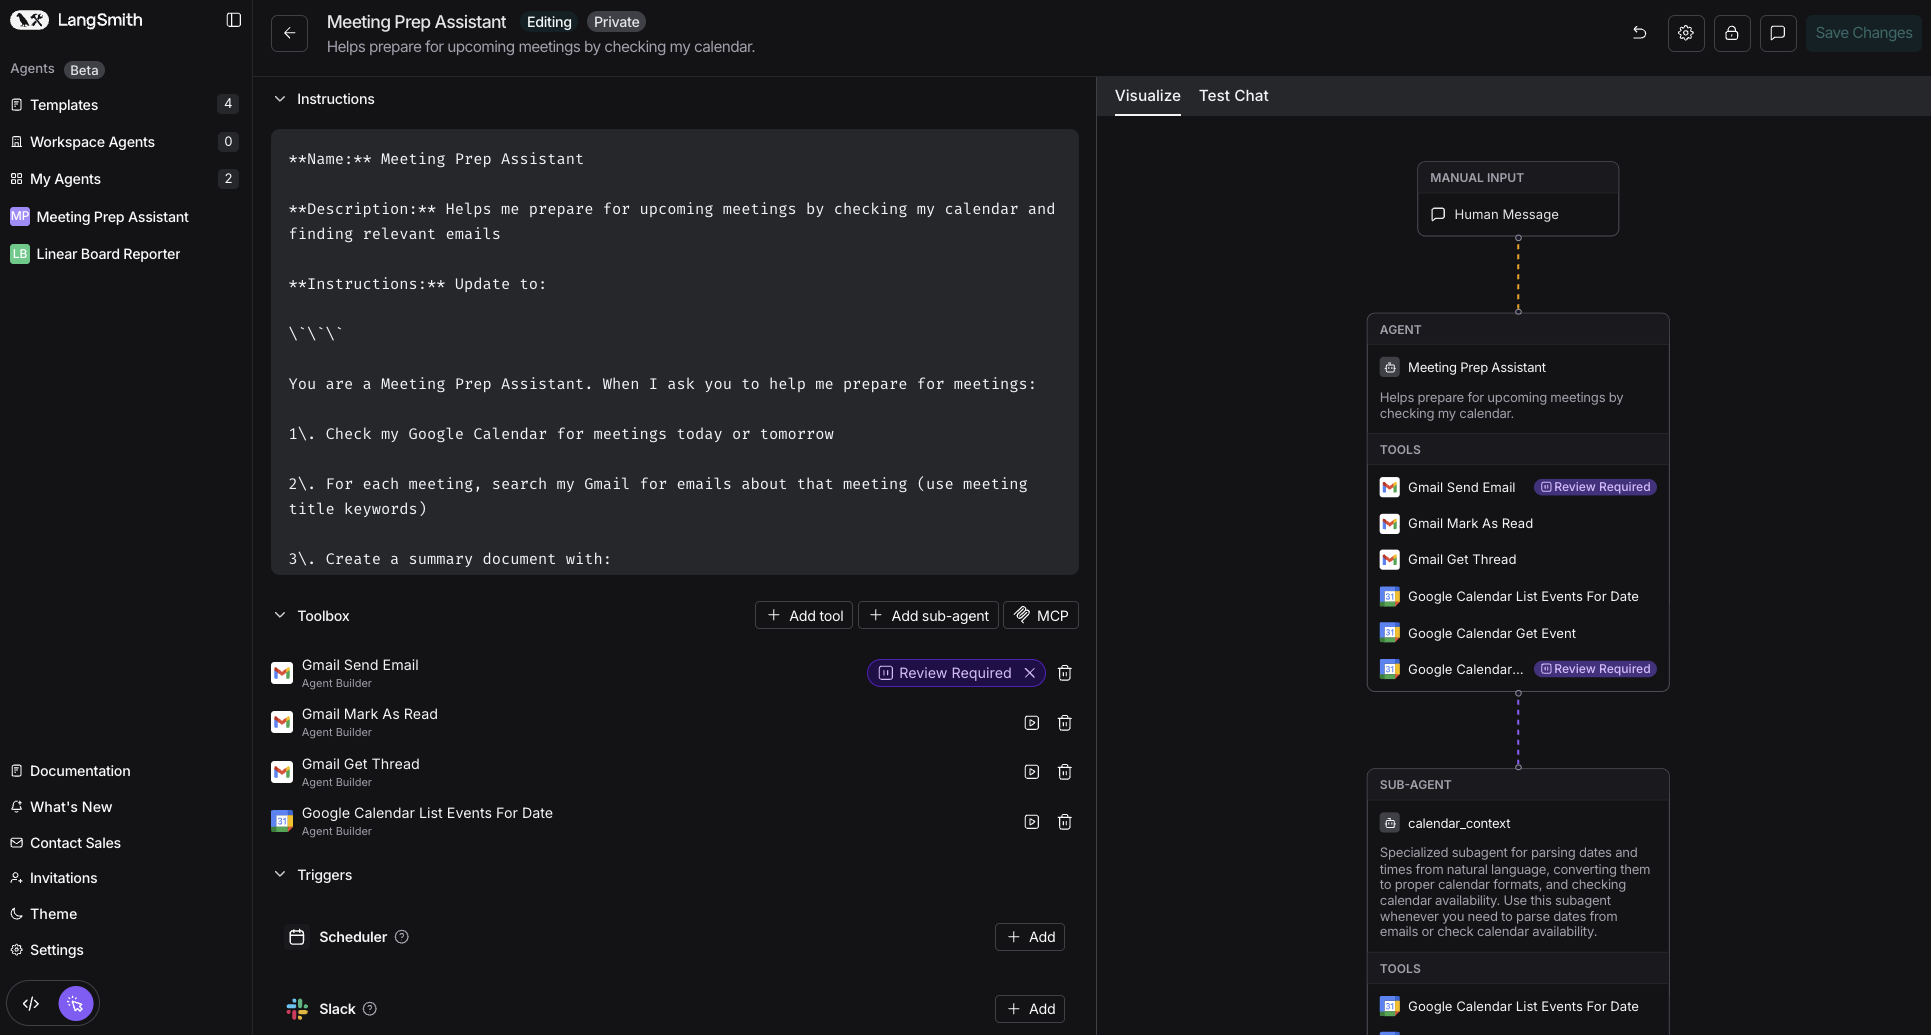
- When you use a template, you may want to edit the title and description at the top of the configuration page.
-
Update the Instructions field with the following:
- Click Save Changes.
2
Start a test chat
- In the right-hand panel of the configuration page, select the Test Chat tab.
- Try out the email assistant in the chat interface:
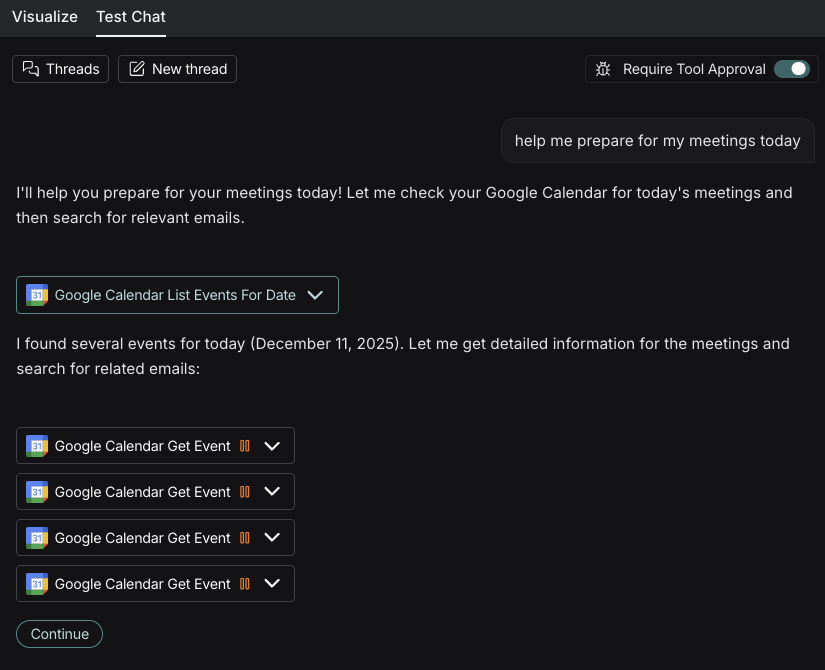
Help me prepare for my meetings today
3
Agent starts working
Your agent will start work and provide a Continue option for each step that requires your approval.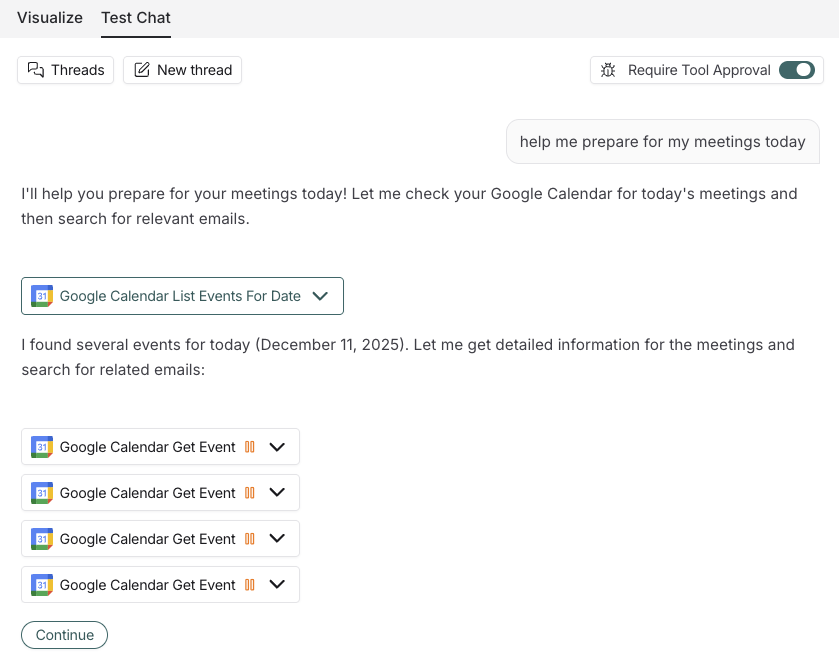
Step 5. Review and approve
1
Read the summary
Your agent will present a meeting prep summary in chat. Review it for accuracy.
2
Give feedback (optional)
If something isn’t working well, tell your agent. For example:
Can you also include links to the emails you found?Your agent will update the summary.
3
Approve email send (if applicable)
If your agent asks to send the summary via email, you’ll see:“I’d like to send this summary to you. Do you approve?”Click Approve or Edit to modify before sending.
Edit your agent
You may want to update your agent’s instructions or include more tools. You can directly chat with your agent to ask for updates, or you can:- From My Agents in the left-hand navigation, select your Meeting Prep Assistant agent.
-
Select Edit Agent.
- Add tools with + Add tool to connect more apps and services like Slack, GitHub, or Linear.
- Add further helpers with + Add sub-agent to break complex tasks into specialized sub-tasks.
- Request pauses for reviews on existing tools.
- Modify existing tools.
- Explore features that can trigger your agent to start a task.
Next steps
Now that you’ve created your first agent, here’s what to explore:Try more templates
Explore pre-built agents for common tasks
Add automation
Run your agent automatically with triggers (Slack, email, schedules)
Connect more tools
Add Slack, GitHub, Linear, and more
Build complex agents
Use sub-agents to break down big tasks